Late one night, fueled by a serious craving for something sweet and totally satisfying, I found myself experimenting in the kitchen with a fresh twist on a classic treat. That’s how this Magic Candy recipe came to life—a little happy accident that turned into my absolute favorite go-to sweet candy treat. I was chasing bold flavor, simplicity, and a no-fuss way to bring some magic to the table. Spoiler alert: this recipe delivered all that and more, transforming an ordinary candy moment into a serious flavor adventure.
What I love most about this Magic Candy recipe is how it balances old-school comfort with a fresh pop of excitement. Each bite brings that “oh wow!” feeling, perfect for weeknight cravings or last-minute entertaining. The blend of textures and flavors turns simple ingredients into something spectacular, making every meal feel special. Plus, it’s a no-bake candy recipe, which means it’s quick, easy, and absolutely stress-free—even when you’re juggling a busy day.
If you’re a fellow food lover who thrives on bold flavors and comfortable with shaking up the classics, then welcome to this sweet corner of delicious magic! I’m beyond thrilled to share this Magic Candy recipe with you because it embodies everything I believe in: comfort food with a twist, satisfying results, and fun in the kitchen. Get ready to sprinkle some joy into your pantry and your plates. And trust me, once you try this, it’s going to be a recipe you’ll want to whip up again and again.
Before we dive in, if you’re all about DIY magic candy and crave both creativity and simplicity, this recipe will be your new best friend. Feeling curious? You’re in the right place. Ready to turn ordinary ingredients into extraordinary sweet candy treats? Let’s get cooking and make some magic happen!
If you love recipes that bring a fresh twist to classic candy favorites, you’ll adore this Magic Candy recipe. And as a bonus, this recipe pairs perfectly with some other fun treats you might want to check out, like this Candy Corn Poke Cake that’s an absolute crowd-pleaser right here on Grill Drip.
INGREDIENTS You Need
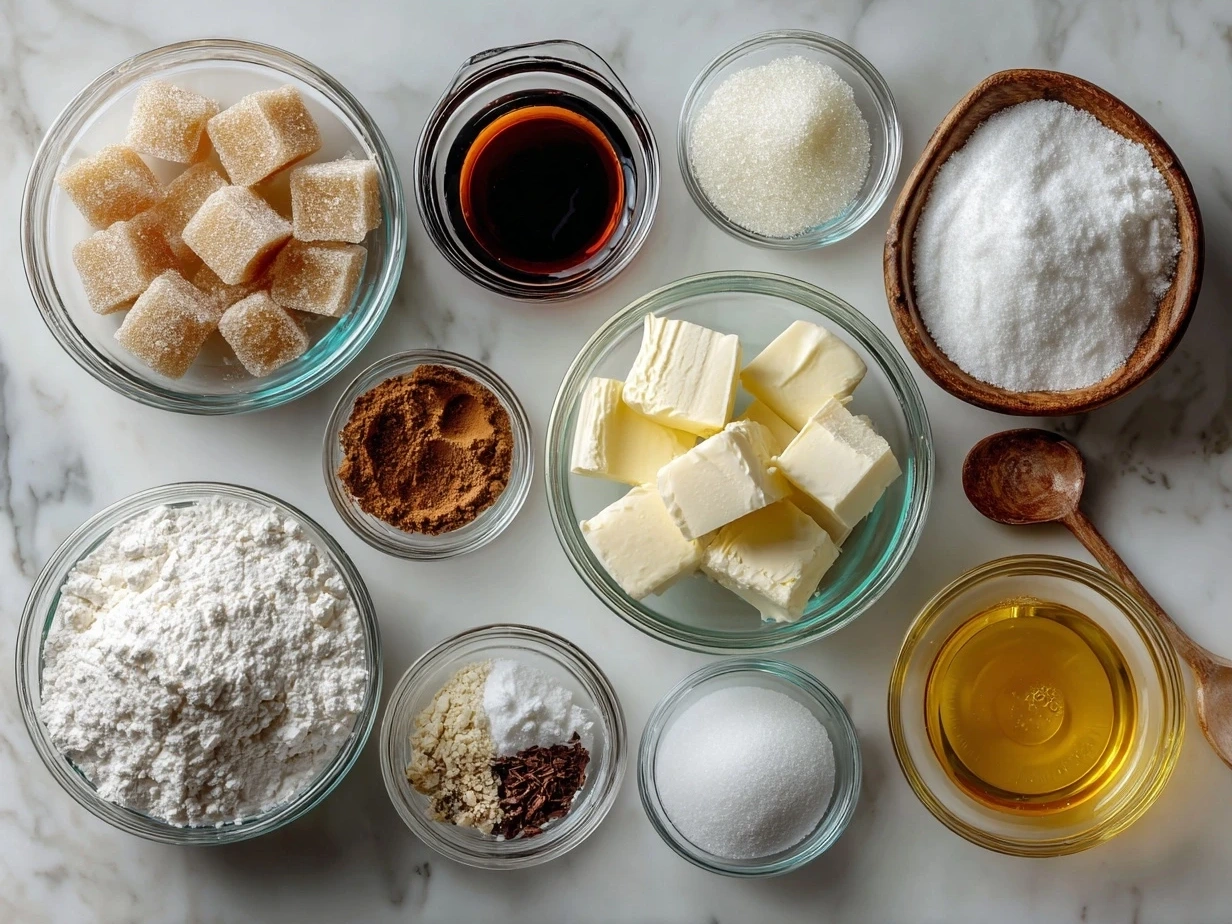
This Magic Candy recipe ingredient list is all about bold flavors that actually work together! Here’s everything you’ll need to make your sweet candy treats shine:
- 2 cups granulated sugar – you can grab this during your normal shopping trip.
- 1/2 cup unsalted butter – I love adding extra for that rich, smooth finish in my Magic Candy recipe.
- 1/4 cup whole milk – no worries if you don’t have whole milk, I often swap it with almond milk in my homemade magic candy for a slight nutty twist.
- 1 cup chopped nuts (pecans or walnuts) – optional but adds a lovely crunch that souls crave.
- 1 teaspoon vanilla extract – this Magic Candy recipe gets its amazing taste from real vanilla.
- Pinch of salt – balances the sweetness.
- 1 cup mini marshmallows – this helps keep it soft and chewy.
If you’re short on time, here’s a little prep shortcut: have your nuts chopped and ready to go before you start. It keeps the magic flowing and stress low. When you’re shopping, you’ll find these ingredients in any regular grocery store aisle—no specialty trips needed!
If you want to amplify the flavor, I recommend adding a splash of bourbon or a sprinkle of cinnamon to your batch of DIY magic candy for a playful twist. These swaps and extras make this Magic Candy recipe endlessly customizable.
For storage, keep your candy in an airtight container at room temperature, and it will stay fresh for up to two weeks. If you want to stretch that love, popping leftovers into the fridge keeps them fresh even longer—but bring them back to room temp before serving.
If you want inspiration for variations on homemade magic candy recipes, check out this fantastic vanilla-flavored Magic Candy recipe shared in this French Country Cottage and Farmhouse Facebook community post. It’s fun to see how different flavor profiles work wonders!
Let’s Make Some!
Ready? This is my favorite part of making Magic Candy recipe—watch the delicious magic happen right in your own kitchen!
- First, melt your butter and sugar together in a heavy-bottomed saucepan over medium heat. Stir gently but constantly so it doesn’t stick. The kitchen starts smelling incredible here—that warm, buttery sweetness is the first clue something amazing is coming!
- Next, slowly add your milk and pinch of salt while stirring. The mixture will thicken and bubble, so keep your eyes on it. I usually let it get to a soft boil for about 3 minutes. Trust me, patience here makes all the difference.
- Remove the saucepan from heat and stir in vanilla and marshmallows—this is where the magic starts happening! The marshmallows will melt and give the candy a beautiful, creamy texture.
- Quickly fold in your chopped nuts or any extras you want to toss in. This part creates that perfect satisfying texture and slight crunch that keeps people coming back for more.
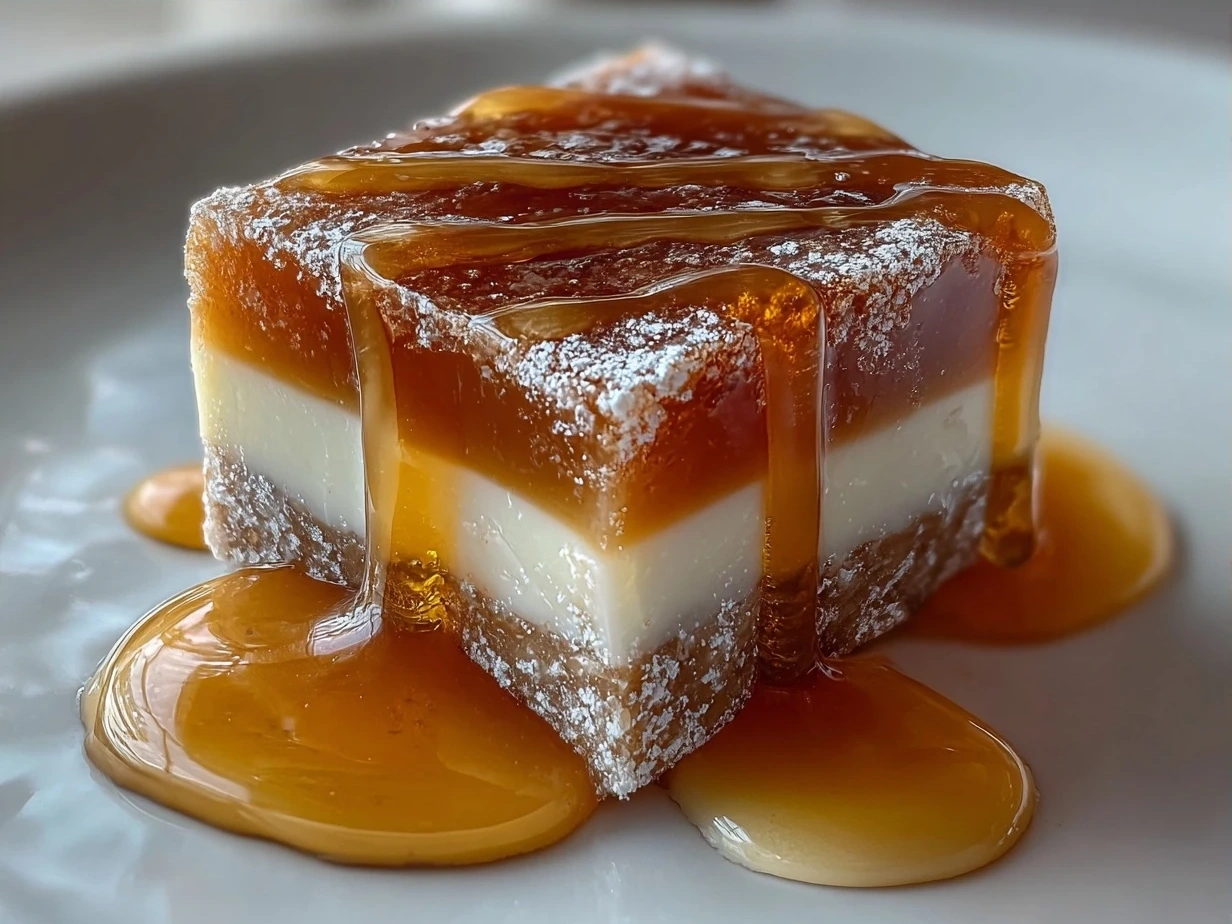
- Pour the mixture onto a greased baking sheet or pan and spread evenly. This is the moment you get to shape your homemade magic candy dreams! Don’t worry if it looks a little messy; that’s all part of the charm.
- Let it cool completely before slicing into bite-sized pieces. The waiting can be hard, but trust me—it’s worth it. Your Magic Candy recipe really sets into something irresistible at this stage.
In my kitchen, this Magic Candy recipe usually takes about 25 minutes from start to finish, not counting the cooling time. For a busy weeknight shortcut, you can spread the mixture into silicone molds for quick portions or simply freeze for 15 minutes for a faster set.
Cooking discoveries? I learned that swapping marshmallows for white chocolate chips changes the texture entirely, giving it a creamier bite—try that for a fun twist! Also, mixing in a few dried cherries or cranberries adds a tart pop that you’d never expect in candy.
If you love seeing the transformation on camera, Sugar Magic by Cristina on YouTube makes some jaw-dropping no-bake candy recipe videos perfect for inspiration. Check it out here.
How to Serve Up This!
People literally do happy dances when this Magic Candy recipe hits the table with a cold glass of milk or a cup of strong coffee. I like to plate mine in colorful small bowls, perfect for sharing at game nights or potlucks. The sweet and nutty flavors contrast beautifully with something tangy, like fresh berries or even a drizzle of tart raspberry sauce.
This Magic Candy recipe is perfect for those weeknight dinners that need to be special but don’t require hours in the kitchen. I’ve served it at casual gatherings where it steals the show every time. When guests bite into these sweet candy treats, their eyes widen and smiles spread instantly—that’s the magic right there!
Got leftovers? Turn them into crunchy bits sprinkled over vanilla ice cream or use as a topping for your favorite pumpkin or candy corn poke cake for a double dose of fun. Speaking of candy corn poke cake, if you’re loving this comfort food twist, you’ll go crazy for this Candy Corn Poke Cake—give it a whirl and see for yourself!
If you want to try a fusion take, I’ve mixed my Magic Candy recipe with a sprinkle of sea salt and chili powder for a spicy-sweet kick that surprises and delights. For an indulgent treat, I highly recommend pairing with this Strawberry Cool Whip Candy—it’s a flavor powerhouse!
Pro tip: this magic candy is also great when wrapped in parchment paper and gifted to friends and family during the holidays or just because. It’s a sweet way to show you care.
FAQs:
Will kitchen newbies succeed with this Magic Candy recipe?
Absolutely! This no-bake candy recipe is designed to be straightforward and beginner-friendly. I’ve had lots of fellow food lovers try it for the first time and nail it with flying colors. Just keep stirring when you’re melting and don’t rush the cooling.
What if I mess up my Magic Candy recipe?
Spoiler: it’ll still taste incredible! Even my kitchen experiments that get a little sticky have ended up as tasty variations. If it’s too soft, try a little longer cooling in the fridge. Too hard? A quick microwave heat to soften can save the day.
Can I prep this Magic Candy recipe for busy weeknights?
Yes! This recipe comes together quickly—perfect for when your time is tight. Plus, it can be made ahead and stored in an airtight container. I like prepping it the day before to have a sweet treat ready.
Are there any allergen substitutions?
No worries! If you’re nut-free, omit the nuts or swap with seeds like pumpkin or sunflower. If dairy is off limits, I’ve successfully used coconut oil instead of butter and powdered coconut milk in place of whole milk. The flavor stays fantastic.
How long does Magic Candy recipe stay fresh?
Stored properly at room temp in a covered container, it lasts up to two weeks. I suggest keeping it in a cool, dry spot away from direct sunlight.
Can I experiment with flavors in this Magic Candy recipe?
For sure! I love adding espresso powder for a coffee twist or swapping vanilla for almond extract. Your taste buds are your guide here.
Is this Magic Candy recipe kid-friendly?
Totally! It’s a fun and safe recipe to get kids in the kitchen helping out—plus, they get to enjoy the sweet results.
If you want to see different takes on homemade magic candy, this Facebook post sharing discrepancies in ingredients is a fascinating read. It reminds us there’s no one way to love Magic Candy recipe.
CONCLUSION:
This Magic Candy recipe brings me so much joy because it’s proof that simple ingredients can create pure delicious magic with just a little love and a few kitchen experiments. The way it melts in your mouth with the perfect balance of sweet, creamy, and crunchy never gets old.
My Magic Candy recipe Flavor Secrets:
– Fresh vanilla extract is a game-changer.
– Using real butter over margarine kicks richness up a notch.
– Adding a pinch of salt sharpens the sweetness beautifully.
Over time, I’ve tested some delicious Magic Candy recipe variations too! Think spicy-sweet with a dash of cayenne, rich chocolate swirl, and even a tropical twist with shredded coconut and macadamia nuts. Each version suits different occasions—spicy for game nights, chocolate for birthdays, tropical for summer gatherings.
I encourage you to trust your taste buds and get playful in your kitchen. The joy of this Magic Candy recipe is that it invites your own creative flair and celebrates happy accidents. I’m so excited for your flavor adventures. When you try this, be sure to swing by and share your stories!
For more crowd-pleasing, bold flavor sweet candy treats, dive into these Grill Drip favorites: the nostalgic charm of Old Fashioned Gumdrop Nougat Candy, the creamy fruity delight of Strawberry Cool Whip Candy, or the festive fun of Candy Corn Poke Cake.
Your next kitchen victory is just one Magic Candy recipe away!
Magic Candy recipe
This Magic Candy recipe creates a delightful, natural sweet treat with an easy method that transforms simple ingredients into a colorful, tasty candy perfect for any occasion.
- Prep Time: 10 minutes
- Cook Time: 15 minutes
- Total Time: 25 minutes
- Yield: 8 servings
- Category: Dessert
- Method: Baked
- Cuisine: American
Ingredients
- 2 cups granulated sugar
- 2/3 cup light corn syrup
- 1/2 cup water
- 1/2 teaspoon flavor extract (vanilla, peppermint, or your choice)
- Food coloring (optional)
- Powdered sugar for dusting
Instructions
- In a medium saucepan, combine sugar, corn syrup, and water. Stir over medium heat until sugar dissolves.
- Bring mixture to a boil without stirring until it reaches 300°F (hard crack stage) on a candy thermometer.
- Remove from heat and carefully stir in flavor extract and food coloring if using.
- Pour the hot candy mixture onto a greased baking sheet or silicone mat and allow it to cool slightly.
- Once cool enough to handle, break the candy into pieces and dust with powdered sugar to prevent sticking.
Notes
For a fun variation, try adding finely chopped nuts or edible glitter before the candy hardens.