Hey there, fellow food lovers! Nyla here, and I’m SO excited to welcome you to my delicious corner of the internet! Get ready, because we’re about to dive headfirst into a flavor adventure that’s pure comfort food magic. Today, we’re not just making a treat; we’re whipping up a batch of Christmas Cool Whip Candy! This isn’t your average candy recipe; it’s a flavor explosion that turns any gathering into a celebration.
You know how much I love experimenting in the kitchen, right? Well, this Christmas Cool Whip Candy recipe was born from one of those late-night cravings – the kind where you just need something sweet, satisfying, and utterly amazing. I was playing around with some Cool Whip (because, let’s be real, Cool Whip makes everything better!), and bam! Suddenly, this incredible concoction was born! The best part? It’s unbelievably easy to make, even for kitchen newbies. I can’t wait to share this exciting recipe with you.
The first time I made this, my friends went absolutely crazy for it. I brought a batch of Christmas Cool Whip Candy to a game night, and it was gone in minutes. Seriously, people were doing happy dances after just one bite! The best part? It’s so versatile; you can customize it with your favorite flavors and colors. So, if you’re ready to get into the kitchen and whip up some delicious magic, let’s dive in! I’m beyond thrilled to share this incredible recipe with you, and I can’t wait to hear about your own Christmas Cool Whip Candy creations!
INGREDIENTS You Need
This Christmas Cool Whip Candy ingredient list is all about bold flavors that actually work together! You can grab everything during your normal shopping trip. Here’s what you’ll need to make this deliciousness happen:
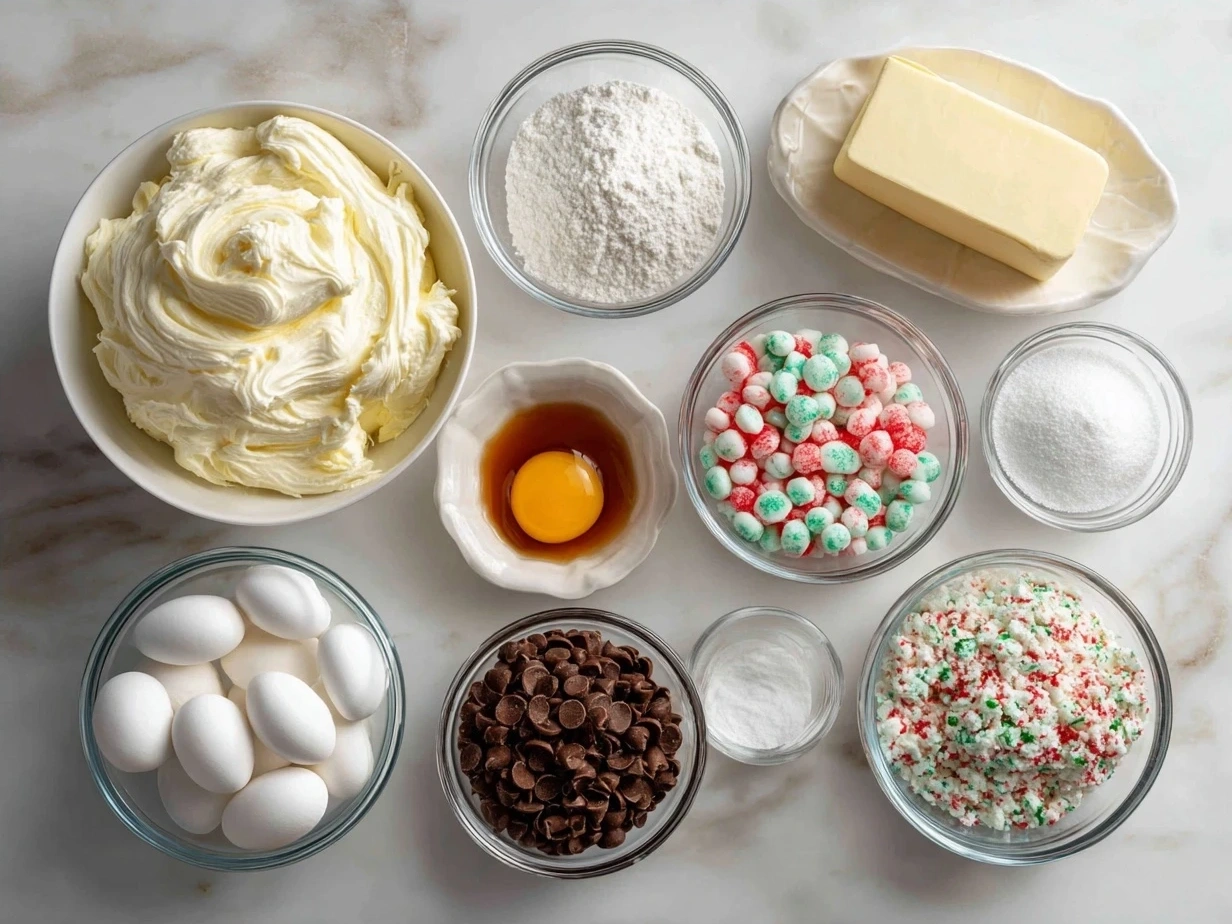
- 1 (8 ounce) container of Cool Whip: This is the creamy base that makes our candy so smooth and dreamy. You can grab this during your normal shopping trip.
- 1 (3.9 ounce) package of instant vanilla pudding mix: This adds sweetness and helps the candy set perfectly.
- 1 cup powdered sugar: For that extra touch of sweetness and texture.
- 1/2 cup milk: To help the pudding mix blend smoothly.
- 1 teaspoon vanilla extract: This Christmas Cool Whip Candy gets its amazing taste from a good dose of vanilla.
- 1/2 cup Christmas sprinkles: Because it wouldn’t be Christmas Cool Whip Candy without a festive touch! I love adding extra sprinkles for that extra kick!
- 1/2 cup crushed peppermint candies: Adds a refreshing and festive flavor.
- Optional: Red and green food coloring: To make it even more festive!
No worries if you don’t have peppermint candies! I use crushed candy canes all the time in my Christmas Cool Whip Candy. It gives it a similar minty flavor and adds a festive touch. And if you’re feeling extra adventurous, try adding a pinch of sea salt to balance out the sweetness. Trust me, it’s a game-changer! Store any leftover Christmas Cool Whip Candy in an airtight container in the refrigerator to keep it fresh and delicious.
Let’s Make Some!
Okay, fellow food lovers, let’s get this Christmas Cool Whip Candy party started! These numbered steps are written like you’re cooking with me in my kitchen. Get ready for some delicious magic!
- First, in a large bowl, whisk together the instant vanilla pudding mix and milk until smooth. This is where the magic starts happening! In my kitchen, this usually takes about 1-2 minutes.
- Next, gently fold in the Cool Whip until everything is well combined. Don’t overmix; we want to keep that light and airy texture. This is my favorite part of making Christmas Cool Whip Candy – watch the magic happen!
- Add the powdered sugar and vanilla extract, and gently fold again until everything is just combined. Don’t worry if your Christmas Cool Whip Candy looks a little lumpy at this point; it’ll smooth out as it chills.
- Now, divide the mixture into two bowls if you’re using food coloring. Add a few drops of red food coloring to one bowl and green food coloring to the other. Stir until you reach your desired shade of festiveness!
- Gently fold in the Christmas sprinkles and crushed peppermint candies into both bowls. Feel free to add more sprinkles than the recipe calls for (I always do!).
- Line an 8×8 inch baking dish with parchment paper. This will make it super easy to remove the candy later.
- Pour the red mixture into one side of the dish and the green mixture into the other. For a marbled effect, gently swirl the two colors together with a knife or spatula.
- Cover the dish with plastic wrap and refrigerate for at least 2-3 hours, or until the candy is firm. While your Christmas Cool Whip Candy is doing its thing, get ready for some amazing aromas!
- Once the candy is firm, lift it out of the dish using the parchment paper. Cut it into squares and get ready to serve! I love to add a sprinkle of extra crushed peppermint on top.
And there you have it – your very own batch of Christmas Cool Whip Candy! Seriously, could it be any easier? I discovered that the best part of this recipe is how customizable it is! You can throw in any mix-ins you want. I’ve tried everything from chopped nuts to mini marshmallows. I am beyond thrilled to share this incredible recipe with you, and I can’t wait to hear about your own Christmas Cool Whip Candy creations!
How to Serve Up This!
People literally do happy dances when this Christmas Cool Whip Candy hits the table with a few simple additions! It’s so versatile! I love to enjoy this Christmas Cool Whip Candy in so many ways!
- On a Festive Platter: Arrange the candy squares on a pretty platter with other holiday treats like cookies and brownies.
- With Hot Chocolate: Serve a square or two alongside a warm mug of hot chocolate for the ultimate cozy experience.
- As a Gift: Package the candy in small cellophane bags and tie with ribbon for a sweet homemade gift.
- In a Cookie Exchange: Bring a batch to your next cookie exchange party and watch everyone’s eyes light up. This Christmas Cool Whip Candy is perfect for those holiday gatherings.
- With Ice Cream: Crumble a square of candy over a scoop of vanilla ice cream for a delicious and festive sundae.
This Christmas Cool Whip Candy is perfect for those weeknight dinners that need to be special! For a fusion variation, try adding a hint of orange zest to the mixture for a citrusy twist. Trust me, it’s amazing! And if you have any leftovers (which I highly doubt!), you can crumble them over pancakes or waffles for a festive breakfast treat. See another Cool Whip Candy recipe.
FAQs:
Alright, fellow food lovers, let’s tackle some common questions about this Christmas Cool Whip Candy. I know you’re gonna ace it!
Q: Will kitchen newbies succeed with this Christmas Cool Whip Candy?
A: Absolutely! This recipe is incredibly easy and straightforward. If you can whisk and fold, you’re golden!
Q: Can I use sugar-free pudding mix?
A: Yes, you can! It won’t affect the texture or flavor too much. I’ve tried it myself, and it still tastes amazing.
Q: What if I mess up my Christmas Cool Whip Candy? (Spoiler: it’ll still taste incredible!)
A: Don’t sweat it! Even if it’s not perfect, it’ll still be delicious. Just embrace the imperfections and enjoy the process!
Q: How can I prep this Christmas Cool Whip Candy for busy weeknights?
A: You can totally make it ahead of time! It keeps well in the fridge for several days. In fact, I often make a batch on Sunday to enjoy throughout the week.
Q: Can I use different flavors of pudding mix?
A: Definitely! Chocolate, pistachio, or even cheesecake pudding mix would be amazing in this recipe. Get creative and experiment with your favorite flavors! Learn about Cool Whip Candy variations.
Q: Can I freeze this Christmas Cool Whip Candy?
A: I don’t recommend freezing it, as the texture may change. It’s best enjoyed fresh from the fridge.
Q: What other mix-ins can I use?
A: The possibilities are endless! Try chopped nuts, mini marshmallows, chocolate chips, dried fruit, or even a swirl of peanut butter. Explore quick no bake christmas cookie recipes for inspiration!
Q: Can I make this recipe vegan?
A: Yes, you can! Just use a vegan whipped topping and pudding mix. I’ve used coconut whipped cream with great results!
Q: How do I prevent the colors from bleeding together when making the marbled effect?
A: Be gentle when swirling the colors together. Overmixing will cause them to blend too much.
Q: Is there a substitute for the peppermint candies?
A: If you don’t like peppermint, you can use other crushed candies like M&Ms or toffee bits. It really depends on what you want your Christmas Cool Whip Candy to taste like!
I hope those FAQs were helpful! Remember, cooking is all about experimenting and having fun. Don’t be afraid to try new things and put your own spin on this Christmas Cool Whip Candy recipe. Discover more holiday recipes.
CONCLUSION:
This Christmas Cool Whip Candy brings me so much joy because it’s simple, festive, and utterly delicious. It’s the perfect treat to share with friends and family during the holiday season, and it always brings a smile to everyone’s face.
My Christmas Cool Whip Candy Flavor Secrets:
- Don’t skimp on the sprinkles! The more, the merrier!
- Use high-quality vanilla extract. It makes a big difference in the overall flavor.
- Chill it for at least 3 hours. This is essential for the candy to set properly.
Delicious Christmas Cool Whip Candy Variations I’ve Tested:
- Chocolate Peppermint: Use chocolate pudding mix and add extra peppermint extract. This version is perfect for chocolate lovers.
- Gingerbread Spice: Add a teaspoon of gingerbread spice to the mixture for a warm and cozy flavor. This is my go-to for Christmas Eve!
- Cranberry Pistachio: Add dried cranberries and chopped pistachios for a festive and flavorful twist. Easy Holiday Treat! Danny N shares a delicious holiday treat using …
I’m beyond excited for you to try this Christmas Cool Whip Candy recipe and create your own delicious variations! Trust your taste buds, get creative, and most importantly, have fun in the kitchen. This simple treat is a game changer. So get excited and be prepared for this Christmas Cool Whip Candy. I have had great success by making Christmas Cool Whip Candy and bringing it to Christmas gatherings.
This is more than just a recipe. It’s about creating memories and sharing delicious moments with the people you love. So go ahead, fellow food lovers, and whip up a batch of this amazing Christmas Cool Whip Candy. I can’t wait to hear about your cooking adventures! Find more cool whip recipes!
\n \n Print
Christmas Cool Whip Candy

This Christmas Cool Whip Candy is a delightful no-bake treat that’s perfect for holiday gatherings. It’s creamy, festive, and incredibly easy to make with just a few simple ingredients.
- Prep Time: 10 minutes
- Cook Time: 0 minutes
- Total Time: 10 minutes
- Yield: 16 servings
- Category: Dessert
- Method: No-Cook
- Cuisine: American
Ingredients
- 1 (8 ounce) container frozen whipped topping, thawed (Cool Whip)
- 1 (3.4 ounce) package instant vanilla pudding mix
- 1 cup powdered sugar
- 1/2 cup milk
- 1/2 cup crushed peppermint candies
- Red and green sprinkles (optional)
Instructions
- In a large bowl, whisk together the instant vanilla pudding mix and milk until smooth.
- Gently fold in the thawed Cool Whip until well combined.
- Add the powdered sugar and crushed peppermint candies to the bowl. Mix until evenly distributed.
- If desired, stir in red and green sprinkles.
- Transfer the mixture to a parchment-lined 8×8 inch baking dish.
- Refrigerate for at least 2 hours, or until firm.
- Cut into squares and serve chilled.
Notes
For an extra festive touch, drizzle melted white chocolate over the candy before chilling.