Hey there, fellow food lovers! Nyla here, ready to share one of my absolute favorite comfort food creations. This recipe turns any meal into something special! Are you ready for a flavor adventure?
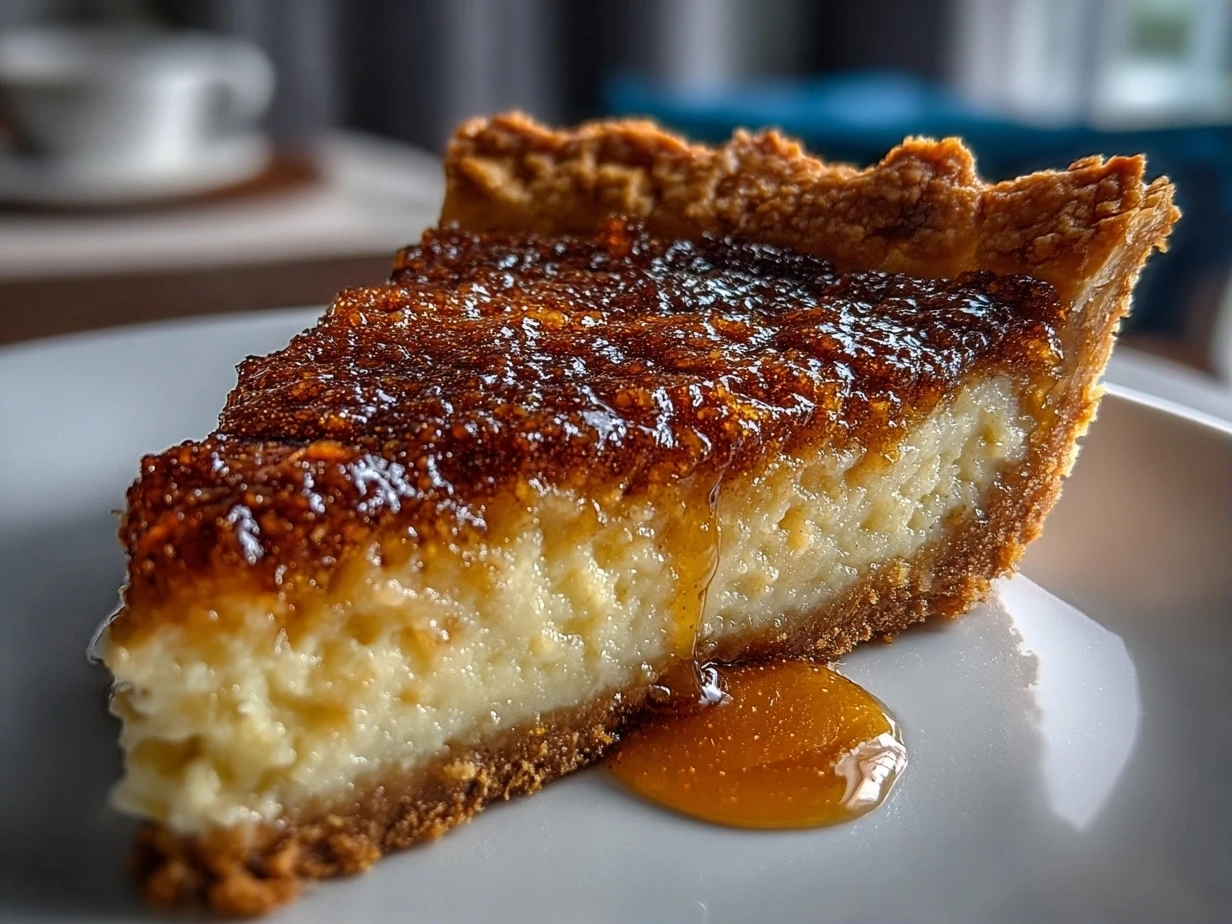
I’m talking about my Burnt Honey Pie.
I discovered this gem during one of my late-night kitchen experiments. The goal? To make a pie that wasn’t just sweet, but had a depth of flavor that would make you close your eyes and savor every single bite.
The aroma that filled my kitchen as this Burnt Honey Pie baked was pure bliss. It was a happy accident turned into a family favorite!
My friends went wild for this pie. When they tasted the Burnt Honey Pie, I knew I had something special.
I’m beyond excited to share this incredible recipe with you. Get ready for a slice of heaven! Let’s dive into the deliciousness!
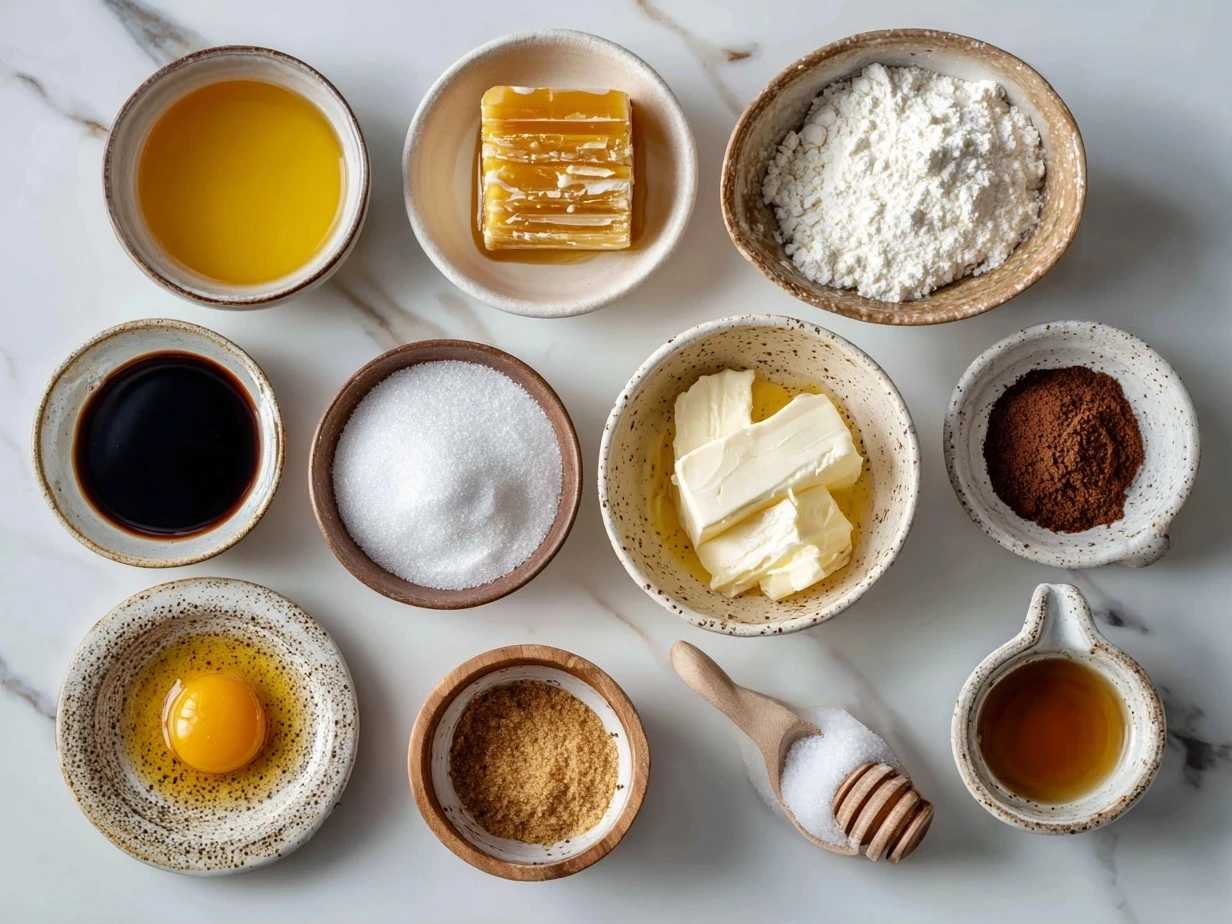
INGREDIENTS You Need
This Burnt Honey Pie ingredient list is all about bold flavors that actually work together! Don’t be intimidated by the “burnt” part; it’s just caramelized honey that adds a nutty, toasty flavor.
Here’s what you’ll need:
- 1 pre-made pie crust: (You can totally make your own, but sometimes shortcuts are necessary!)
- 1/2 cup (1 stick) unsalted butter: Adds richness and flavor.
- 3/4 cup honey: The star of the show! I prefer a local wildflower honey for my Burnt Honey Pie.
- 1/2 cup granulated sugar: Helps with the caramelization process.
- 1/4 teaspoon salt: Balances the sweetness.
- 1 1/2 cups heavy cream: Creates that creamy, dreamy texture.
- 4 large egg yolks: Adds richness and structure to the honey custard pie.
- 1 teaspoon vanilla extract: Enhances the other flavors.
- 1 (14-ounce) can sweetened condensed milk: Makes the filling extra creamy and decadent.
No worries if you don’t have heavy cream on hand. I use full-fat coconut milk all the time in my Burnt Honey Pie. It adds a subtle coconut flavor that’s absolutely divine!
This Burnt Honey Pie gets its amazing taste from the caramelized honey. It’s what sets it apart from other honey dessert recipes.
For a bolder flavor, try using buckwheat honey. It has a stronger, more molasses-like taste that pairs beautifully with the other ingredients in this Burnt Honey Pie.
You can grab these ingredients during your normal shopping trip! I love adding a pinch of sea salt flakes to my Burnt Honey Pie for that extra kick. It contrasts the sweetness perfectly.
Let’s Make Some!
Ready to create some delicious magic? Let’s get started on our Burnt Honey Pie! Don’t worry if you’re a kitchen newbie – this recipe is super straightforward.
- Preheat your oven to 350°F (175°C). Place your pie crust in a pie dish. If you’re using a store-bought crust, make sure it’s thawed.
- Melt the butter in a medium saucepan over medium heat. Once melted, add the honey, sugar, and salt. Stir constantly until the sugar dissolves. This is where the magic starts happening!
- Continue to cook the honey mixture, stirring occasionally, until it turns a deep amber color. This usually takes about 5-7 minutes. Watch it carefully because burnt sugar pie can go from caramelized to burnt very quickly.
- Remove the saucepan from the heat and slowly whisk in the heavy cream. Be careful, as the mixture will bubble up. This step is crucial for that perfect honey custard pie texture!
- In a separate bowl, whisk together the egg yolks, vanilla extract, and sweetened condensed milk. Slowly pour this mixture into the honey mixture, whisking constantly to combine. This is my favorite part of making Burnt Honey Pie – watch the magic happen!
- Pour the honey custard pie filling into the prepared pie crust. Spread it evenly.
- Bake for 45-55 minutes, or until the filling is set but still slightly jiggly in the center. The edges should be golden brown. In my kitchen, this Burnt Honey Pie usually takes about 50 minutes.
- Let the pie cool completely on a wire rack before slicing and serving. This allows the filling to set properly. While your Burnt Honey Pie is doing its thing, get ready for some amazing aromas!
Don’t worry if your Burnt Honey Pie cracks slightly on top. It adds to the rustic charm!
For an extra layer of flavor, try brushing the crust with melted butter and sprinkling it with coarse sugar before baking. I learned this trick from a friend, and it’s a game-changer.
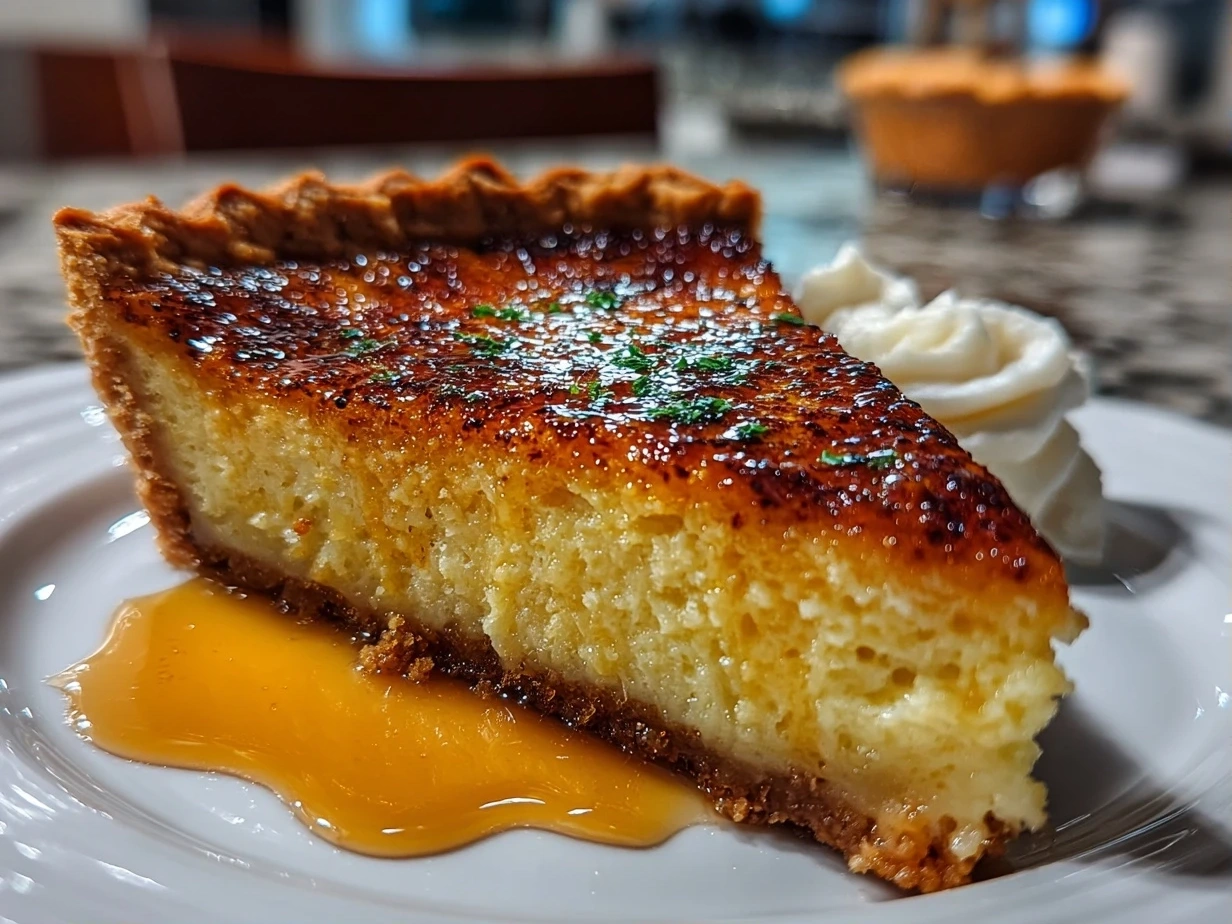
How to Serve Up This!
People literally do happy dances when this Burnt Honey Pie hits the table! Trust me, it’s a crowd-pleaser.
I love to serve this Burnt Honey Pie slightly chilled with a dollop of whipped cream or a scoop of vanilla ice cream. The cold creaminess complements the warm, caramelized honey perfectly.
For a bold flavor pairing, try serving this pie with a sprinkle of flaky sea salt. It elevates the sweetness and adds a sophisticated touch.
This Burnt Honey Pie is perfect for Thanksgiving, Christmas, or any special occasion. It’s also a great dessert to bring to potlucks or game nights.
For presentation, I like to dust the top of the pie with powdered sugar or cocoa powder. You can also garnish it with fresh berries or edible flowers.
Got leftovers? (If so I am IMPRESSED!) Transform them into a delicious bread pudding by cubing the pie and soaking it in a custard mixture before baking. Talk about delicious magic!
I’ve also experimented with a fusion version of this pie by adding a hint of cardamom or cinnamon to the filling. It adds a warm, exotic flavor that’s absolutely delightful.
This Burnt Honey Pie is perfect for those weeknight dinners that need to be special! I remember one time I served it to my neighbor. She said it tasted like something out of a fancy bakery!
FAQs:
I know you’re probably buzzing with questions about this Burnt Honey Pie, so let’s get to some frequently asked questions!
Will kitchen newbies succeed with this Burnt Honey Pie?
Absolutely! This recipe is super forgiving and easy to follow. As long as you watch the honey carefully while it’s caramelizing, you’ll be golden.
What if I mess up my Burnt Honey Pie?
(Spoiler: it’ll still taste incredible!) Even if your pie cracks or the filling isn’t perfectly set, it’ll still be delicious. Imperfections add character!
How can I prep this Burnt Honey Pie for busy weeknights?
You can make the filling ahead of time and store it in the fridge for up to 24 hours. Just give it a good whisk before pouring it into the crust and baking.
Can I use a different type of honey?
Absolutely! Experiment with different honeys to find your favorite flavor. Buckwheat honey adds a bolder, more molasses-like taste, while orange blossom honey adds a delicate floral note.
Is it possible to make this pie gluten-free?
Yes! Simply use a gluten-free pie crust. There are many great options available at most grocery stores.
Can I freeze this Burnt Honey Pie?
Yes, you can freeze the baked pie for up to 2 months. Wrap it tightly in plastic wrap and then in foil. Thaw it in the fridge overnight before serving.
What’s the secret to getting that perfect caramelized honey flavor?
Patience! Don’t rush the caramelization process. Cook the honey mixture over medium heat, stirring occasionally, until it turns a deep amber color. Watch it carefully to prevent burning.
One time, I accidentally added a pinch of cayenne pepper to the filling. It was a happy accident! The slight heat balanced the sweetness perfectly. My family loved it!
Reader Question: “My pie crust always gets soggy. How can I prevent that?”
Answer: “Try blind baking the crust for a few minutes before adding the filling. This will help it crisp up and prevent it from getting soggy.”
CONCLUSION:
This Burnt Honey Pie brings me so much joy because it’s simple, comforting, and packed with bold flavor. It’s a reminder that sometimes the best things in life are the result of happy accidents and kitchen experiments.
My Burnt Honey Pie Flavor Secrets
- Don’t be afraid to experiment with different types of honey.
- Add a pinch of sea salt to balance the sweetness.
- Try brushing the crust with melted butter and sprinkling it with coarse sugar before baking.
I’ve tested so many versions of this amazing dessert recipe. I’ve tried it with salted caramel. That was incredible. I’ve also done some work with a caramelized honey pie that added pecans to the crust! The flavors worked so well together! And I’ve also made a burnt sugar pie that included apples!
For a fall gathering, the caramelized honey pumpkin pie Recipe from Epicurious is a must-try. For a sophisticated twist, check out David Lebovitz’s Salted Honey Pie. And for a completely different honey experience, try The Most Amazing Russian Honey Cake from Cleobuttera. Each version brings its own unique magic to the table. This honey dessert recipe is a guaranteed crowd-pleaser.
Remember, fellow food lovers, trust your taste buds and get creative in the kitchen!
I’m so excited for you to try this Burnt Honey Pie. You’re going to LOVE it! Enjoy the delicious magic! This would go really well with my Honeynut Squash Pasta! If you’re loving this comfort food twist, you’ll go crazy for my Spiced Shrimp with Roasted Honeynut Squash. This Burnt Honey Pie reminds me of another bold flavor favorite: Sausage and Apple Stuffed Honeynut Squash!
Burnt Honey Pie
This Burnt Honey Pie boasts a uniquely rich and smoky flavor profile. The caramelized honey adds a depth of complexity to this creamy, comforting dessert.
- Prep Time: 30 minutes
- Cook Time: 45 minutes
- Total Time: 1 hour 15 minutes
- Yield: 8 servings
- Category: Dessert
- Method: Baked
- Cuisine: American
Ingredients
- 1 1/2 cups all-purpose flour
- 1/2 teaspoon salt
- 1/2 cup (1 stick) cold unsalted butter, cubed
- 4-6 tablespoons ice water
- 1 cup heavy cream
- 1/2 cup granulated sugar
- 1/4 cup burnt honey (see notes)
- 1/4 teaspoon salt
- 4 large egg yolks
- 1 teaspoon vanilla extract
Instructions
- Make the crust: In a large bowl, whisk together the flour and salt. Cut in the butter using a pastry blender or your fingers until the mixture resembles coarse crumbs. Gradually add ice water, one tablespoon at a time, mixing until the dough just comes together.
- Chill the dough: Form the dough into a disc, wrap in plastic wrap, and chill for at least 30 minutes.
- Roll out the dough: On a lightly floured surface, roll out the dough to a 12-inch circle. Transfer to a 9-inch pie plate, trim the edges, and crimp.
- Blind bake the crust: Preheat oven to 375°F (190°C). Line the pie crust with parchment paper and fill with pie weights or dried beans. Bake for 15 minutes. Remove the parchment paper and weights and bake for another 5-7 minutes, or until lightly golden.
- Make the filling: In a medium saucepan, combine the heavy cream, sugar, burnt honey, and salt. Bring to a simmer over medium heat, stirring until the sugar is dissolved.
- Temper the egg yolks: In a separate bowl, whisk together the egg yolks. Slowly drizzle a small amount of the hot cream mixture into the egg yolks, whisking constantly to temper them.
- Combine filling ingredients: Pour the tempered egg yolk mixture into the saucepan with the remaining cream mixture. Cook over low heat, stirring constantly, until the filling thickens slightly and coats the back of a spoon (about 5-7 minutes). Do not boil.
- Add vanilla: Remove from heat and stir in the vanilla extract.
- Pour and bake: Pour the filling into the pre-baked pie crust. Bake for 20-25 minutes, or until the filling is set but still slightly wobbly in the center.
- Cool and chill: Let the pie cool completely at room temperature, then chill in the refrigerator for at least 2 hours before serving.
Notes
For burnt honey, heat honey in a saucepan over medium heat, swirling occasionally, until it deepens in color and develops a slightly smoky aroma. Be careful not to burn it too much, as it can become bitter. Alternatively, use store-bought burnt honey. Serve chilled with whipped cream or a scoop of vanilla ice cream.